Warning: Undefined variable $num in /home/shroutdo/public_html/courses/wp-content/plugins/single-categories/single_categories.php on line 126
Warning: Undefined variable $posts_num in /home/shroutdo/public_html/courses/wp-content/plugins/single-categories/single_categories.php on line 127
Creating a new folder
- Log in to catapult.
- Navigate to File Manager (in the Files section)
- Look for public_html in the left-hand sidebar. Double click on the title.
- Click on the plus sign to create a new folder. Name the folder something like DCS106 (or something) (no spaces)
Installing Jekyll
- Navigate to your Cloud9 instance. If you are a Bates students, login to Catapult, scroll down to “Cloud Apps” and click on the Cloud9 icon:
- Login to your Cloud9 instance. If you are a Bates student, your user name and password were e-mailed to you with the subject “Catapult at Bates College”
- You should see something like this:
 Name your workspace. If you are using this for a class, I’d recommend naming it with the class number or title. Click Add Workspace and then click on the blue name that appeared below.
 - You should see a welcome screen. We are going to close out some of the tabs to do the work we need to do. Close the tabs by clicking on the x that the arrows point to.
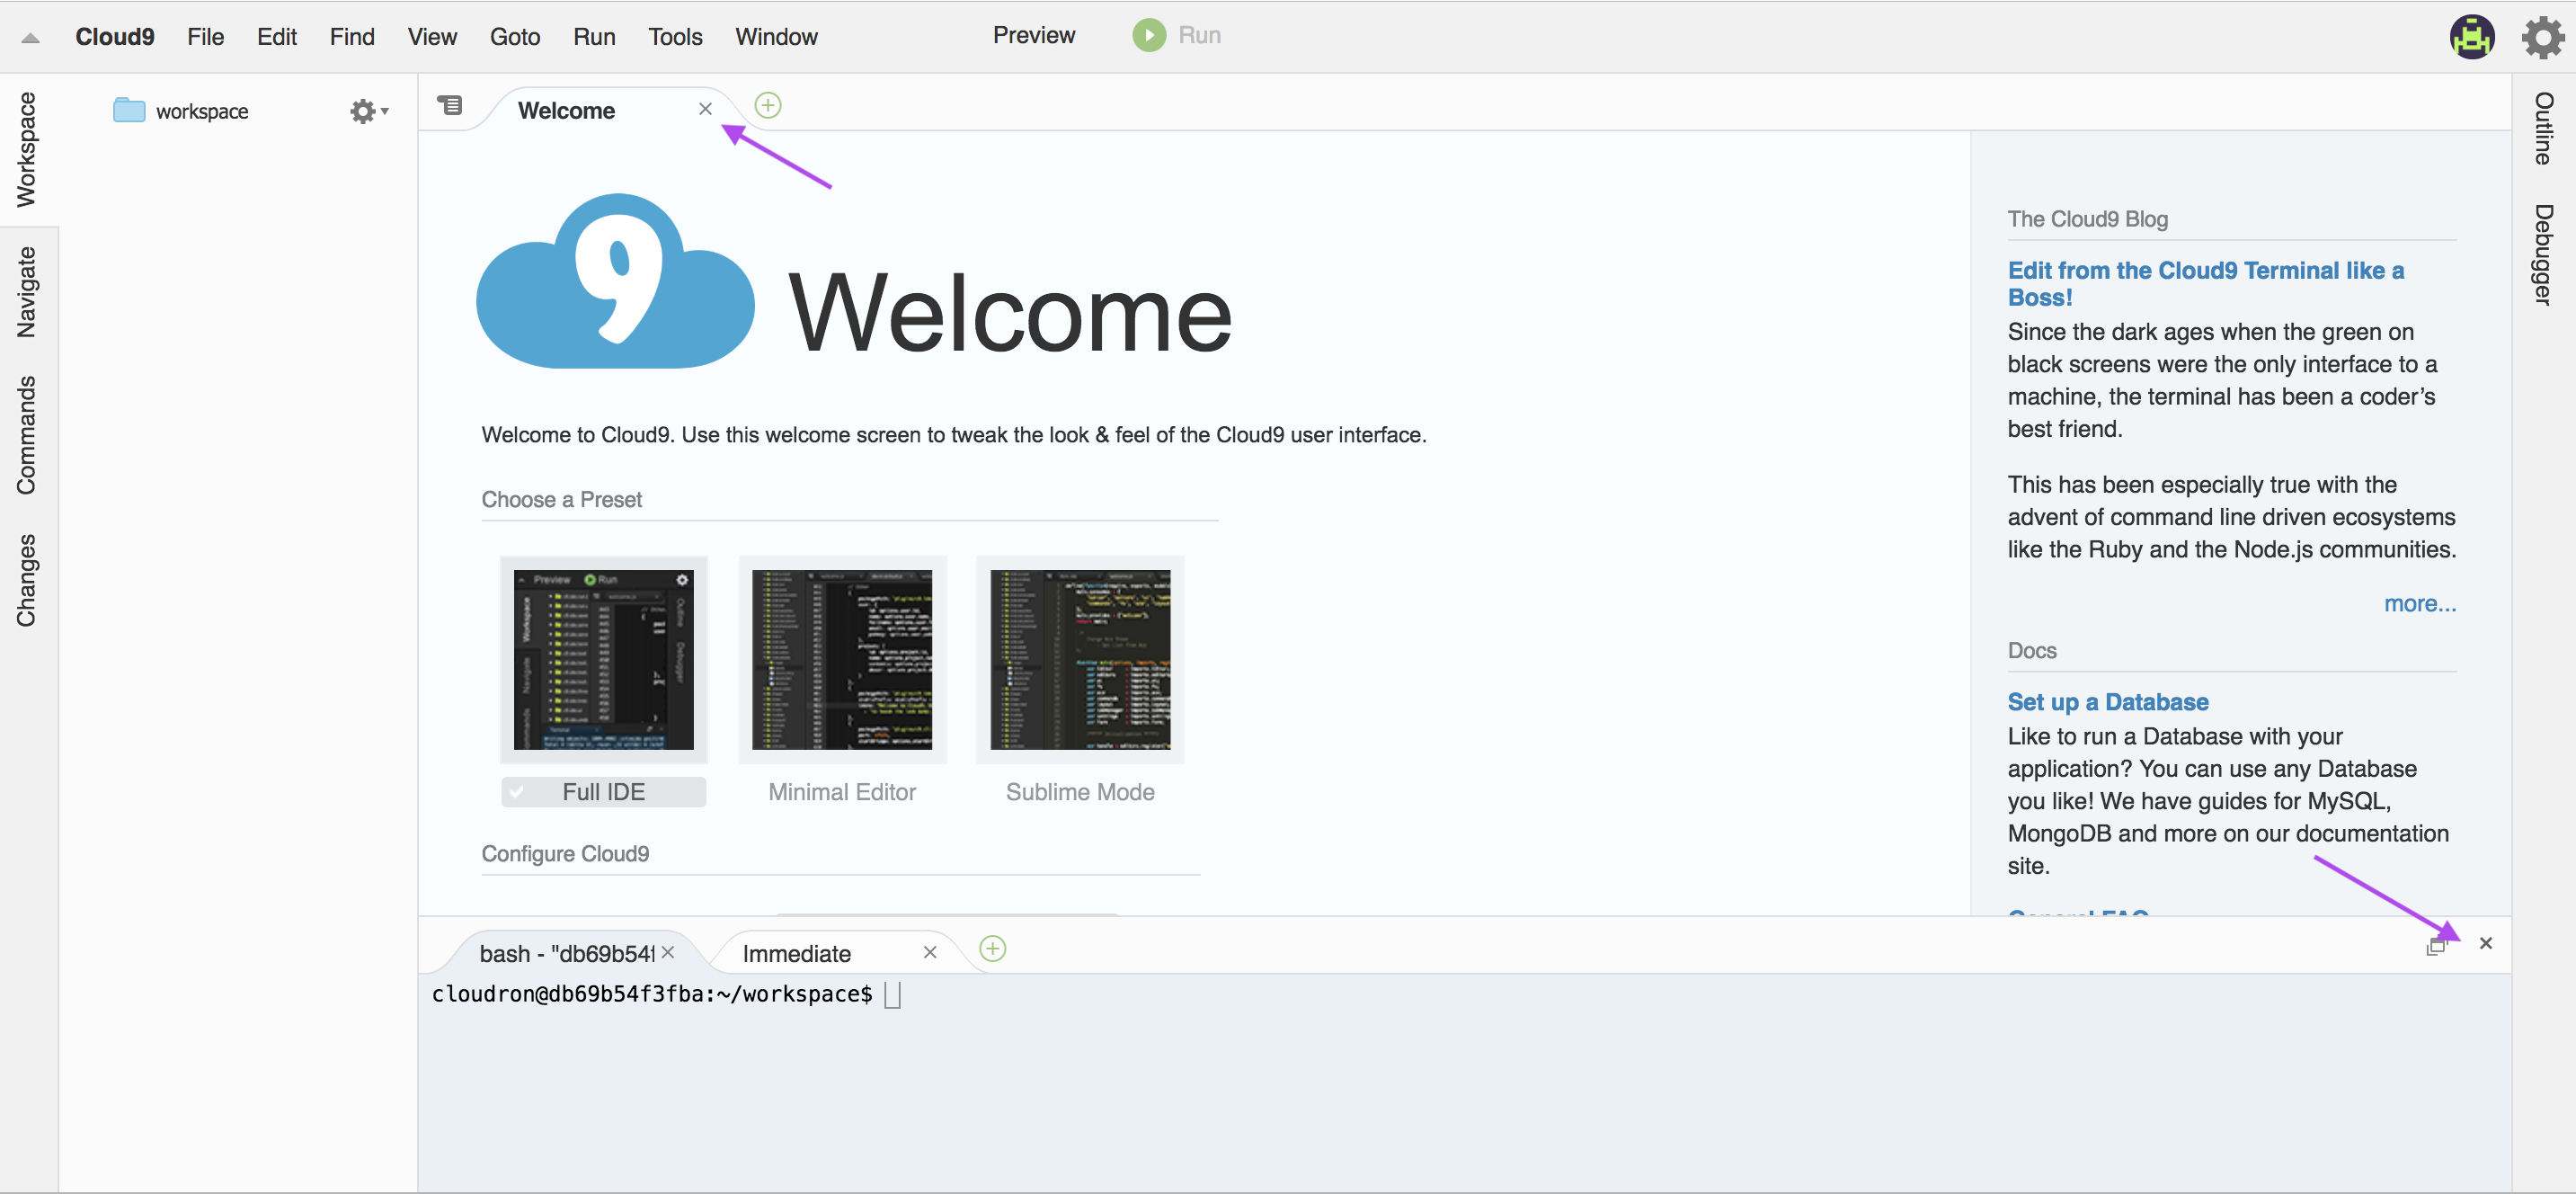
- Click on the green circle with a plus under the GoTo menu. Select New Terminal. This environment allows you to run code that will create a webpage for you. Neat!
- Type in the following code:
sudo gem install bundler jekyll. Hit enter. This installs something called Jekyll, which is what your website will be built on. A whole bunch of code will appear follow. You will know that it is done when you see~/workspace$ - Type in the following code:
jekyll new my-awesome-sitebut replace “my-awesome-site” with the name of your site. If it this is for a class at Bates College, probably name it something that includes the course number and the semester. Replace any spaces in the name with a -. Hit enter. You should see a folder with the name you just entered in the left-hand sidebar. - Once that code finishes running, type in the following code:
cd my-awesome-sitebut replace “my-awesome-site” with the name of the site you created above. This asks the installer to put anything you do in the folder you just created. - Finally, run
bundle exec jekyll serve --host=0.0.0.0 --port=8080. This installs the blogging tool Jekyll in the file you just created!
Customizing Jekyll
- In the top bar of your Cloud9 workspace, click on Preview, and then click Open (followed by a long URL). You should see a site!
- Now, go back to your Cloud9 instance and look in the left-hand sidebar. There should be a folder with the same name as your site. Click on the triangle next to your folder name. You should see a list of folders. Double click on the file called “_config.yml”
- Editing this file will change your site. Change the text following: title, email, description, twitter_username (if you have one) and github_username (if you have one)
- Finally, look for “baseurl:” It should be followed by two quotation marks. In the quotation marks, put / and the name of the folder you created in Creating a New Folder. (For example, if my folder was called DCS106, I would edit baseurl: “” to baseurl: “/DCS106”)
- Save the site using File > Save
- Now edit the About page. Double click on about.md. Edit the text beneath
---to say something about yourself. Save the page using File > Save - We have saved the files, but now we need to update the site. To do that, go back into your terminal tab, and press control+C
- Then run the following code:
jekyll serve --host=0.0.0.0 --port=8080 - Finally, look at the preview again. Your site should have updated!
Hosting Jekyll
- The final step is hosting your new Jekyll site on your Bates domain. Double click on the folder in your sidebar called “_site”. Highlight all of the contents. Right click and select “download”. You should have a file called [+5].tar.gz wherever your files download.
- Navigate to catapult.bates.edu and login.
- Scroll down to File Manager (in the Files section). Double click.
- Locate a folder titles public_html in the left-hand sidebar. Double click on the title.
- Click on the folder you created earlier.
- In the top menu bar, click on Upload
- Drag the file called [+5].tar.gz into the box surrounded by a dotted line
- Click the link below that says “Go Back…”
- Click on the file called [+5].tar.gz and select Extract from the menu bar. Click on Extract File. A box full of text will appear. Click close.
- Now, navigate to www.yourdomain.catapult.bates.edu/yourfoldername (but replace yourfoldername with the name of the folder you created, and yourdomain with your domain) – You should see the same webpage that you previewed before!
- (If you are in DCS106 in Winter 2019, submit your URL using the form here)
Jekyll on Cloud9