Warning: Undefined variable $num in /home/shroutdo/public_html/courses/wp-content/plugins/single-categories/single_categories.php on line 126
Warning: Undefined variable $posts_num in /home/shroutdo/public_html/courses/wp-content/plugins/single-categories/single_categories.php on line 127
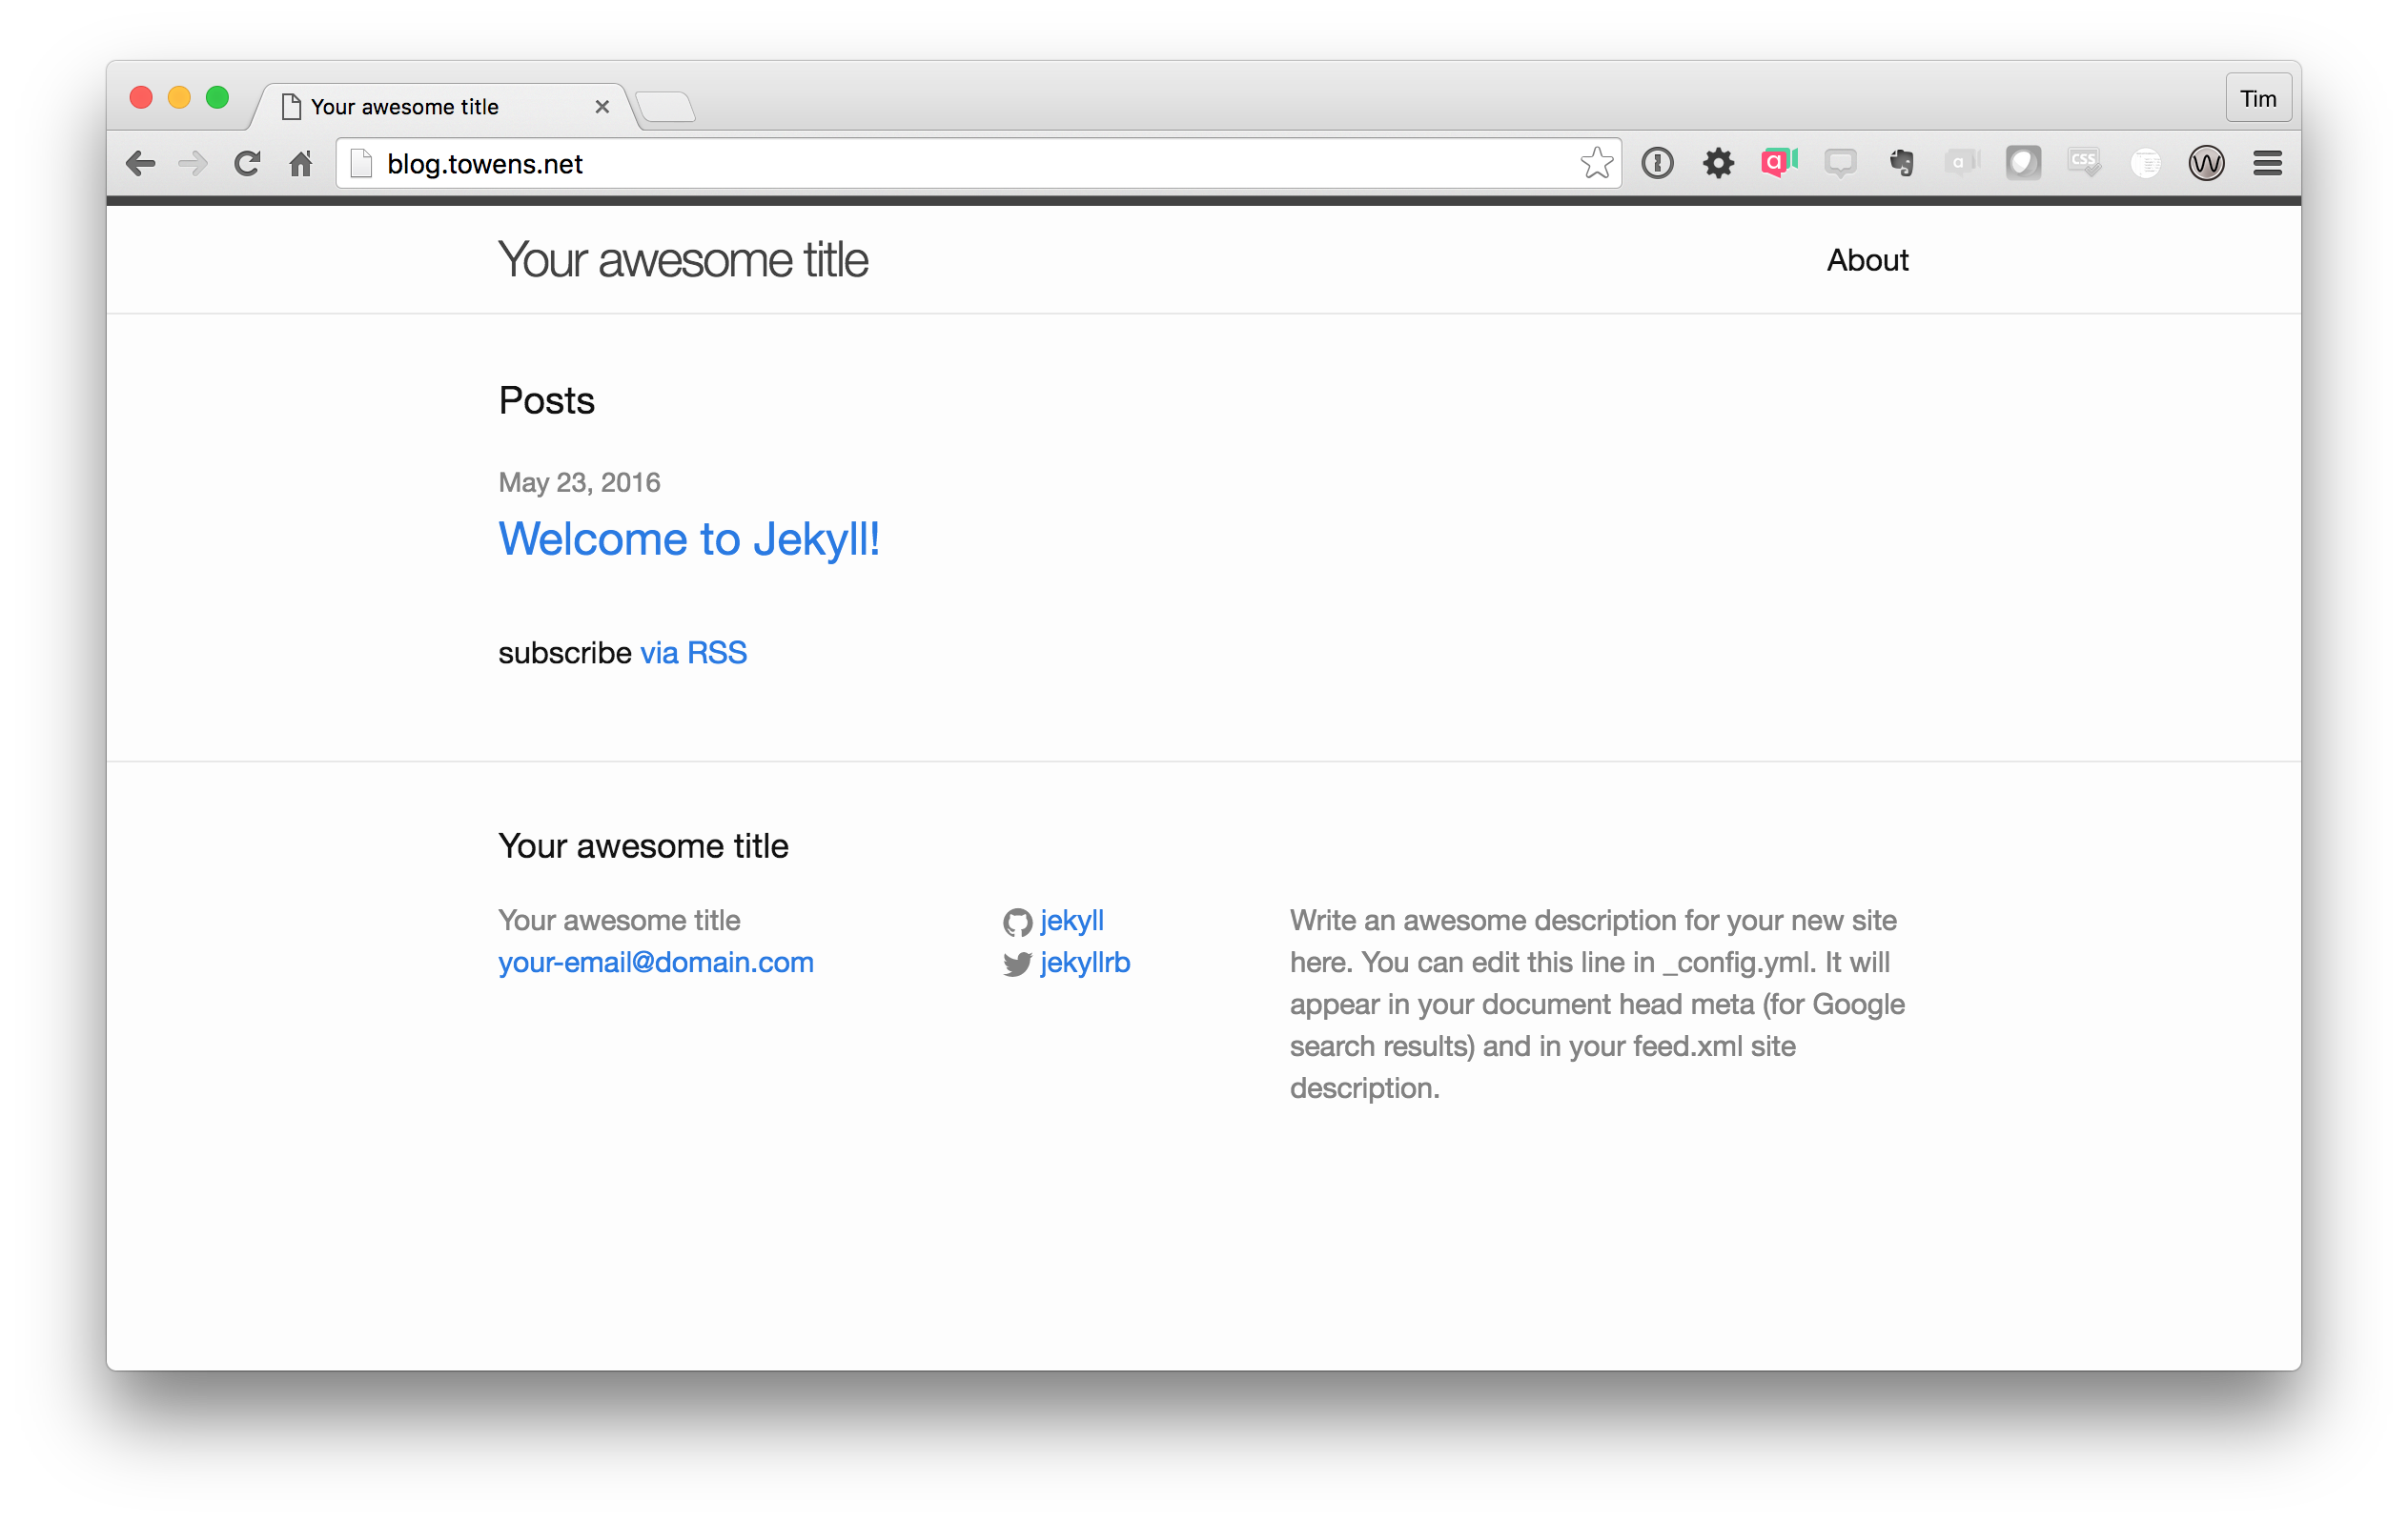
First, make sure that your instance of Jekyll is installed. Your site should look like this:
If it does, great! Move on to the next section. If not, make sure that you’ve:
- Followed the instructions here
- Edited baseurl in your _config.yml folder. It should be “/yourfolder” but replace yourfolder with the name of the folder you created to hold your jekyll instance.
- Saved your files in Cloud9
- Updated your jekyll instance, by running
jekyll build(make sure you are working inside the folder that holds your jekyll instance)
Style!
- Start by logging into Cloud9.
- Then, navigate to the folder that contains your Jekyll instance (use
cd yourfoldername) - Then, update your site, running the code
jekyll build - You should see a folder called “assets” inside of your jekyll instance (NOT inside of your_site folder). If not, run the code
mkdir -p assets - Highlight the “assets” folder
- Click the plus icon and select new file
- Save the new file in the “assets” folder. Title it main.scss
- Navigate to https://www.color-hex.com/ and pick a color that works for you, copy the .
- Paste in the following text, but replace #NNNNNN with the hex code you selected above.
---
---
@import "minima";
body { background-color: #NNNNNN; }
- Save your file. Run
jekyll build. Download the contents of the _site folder, and upload it following the steps in the Jekyll on Cloud9 tutorial.
Styling Jekyll with Cloud9